

How To Use Pillow Python
Python is now ane of the about widely used programming languages in the world. Information technology tin be used to perform diverse functions and tasks using a simple syntax.
One important function Python can perform is automatic processing of digital images, which tin exist done using Pillow.
In this tutorial, we'll show y'all how to process images using the Pillow module. Then, we'll accept it a step farther and demonstrate how to implement some basic image operations.
To follow along with this tutorial, yous should have bones knowledge of Python and the Python 3 interpreter installed on your local machine.
What is Pillow?
Pillow is a fork of the Python Imaging Library (PIL). It is a free and open-source library for manipulating and processing images.
PIL is a powerful library in its own correct, but it hasn't been updated since 2009 and doesn't support Python 3. Pillow provides more features and back up for Python 3.
Pillow supports a range of image file formats, such every bit .PNG, .JPEG, .PPM, .GIF, .TIFF, and .BMP. Y'all can perform diverse operations on images such as cropping, resizing, adding text, rotating, grayscaling, and then much more using this library.
Installation and projection setup
You lot can install Pillow using pip, a package director for Python packages:
python3 -m pip install --upgrade pip python3 -m pip install --upgrade Pillow
Pillow offers the Epitome object, which has inbuilt functions and properties on which manipulation operations tin be carried out.
To become started, start import the I``mage object to the Python file.
from PIL import Image
Next, load the image past calling the Paradigm.open() office, which returns a value of the Epitome object data type.
image = Image.open up('sample.jpg') For our examples, nosotros'll utilize a sample paradigm from Unsplash.
Too worth noting, the images are in the same directory as the Python script file being run.
Properties of the Image object
There are several properties of the image nosotros can access to become more than data from the epitome:
-
prototype.widthreturns the width of the image -
image.heightreturns the height of the image -
image.formatreturns the file format of the image (e.yard., .JPEG, .BMP, .PNG, etc.) -
prototype.sizereturns the tuple peak and weight of the image -
prototype.palettereturns the color palette table, if one exists -
image.modereturns the pixel format of the epitome (e.m., one, 50, RGB, CMYK)
Bones image operations
We are too able to process and manipulate our images using diverse operations.
Whatever changes made to the Paradigm object can exist saved to an image file with the save() method. All the rotations, resizing, cropping, cartoon, and other epitome manipulations are done through via calls on this Image object.
Let'due south zoom in and explore some of these operations in more detail.
Irresolute epitome formats
Pillow supports a broad variety of images formats. An image can be converted from one format to another as follows:
image = Image.open up('sample.jpg') epitome.save('sample_formatted.png') Get-go, the image is loaded. And then, Pillow sees the file extension specified as PNG, so it converts the paradigm to .PNG before saving it to file.
Creating thumbnails
You can resize images past creating a thumbnail of the epitome using Pillow.
Using the thumbnail() function, the image is resized to keep its aspect ratio. This takes ii values representing the maximum width and maximum superlative of the thumbnail.
image = Image.open('sample.jpg') image.thumbnail((200, 200)) image.salvage('sample_thumbnail.jpg') 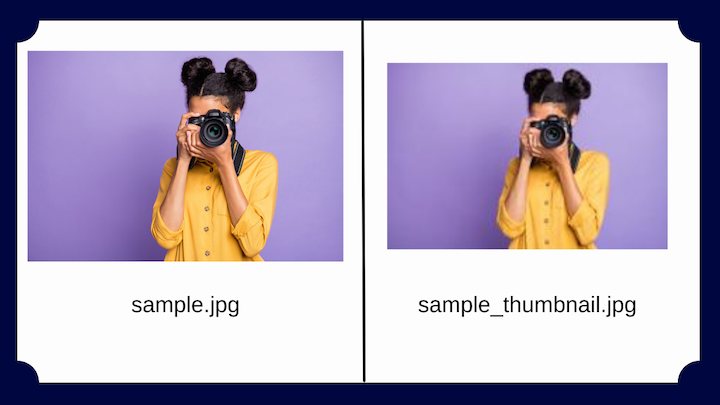
The image is then resized within the maximum limit so as not to be overstretched or blurred.
Flipping and rotating images
If you need the prototype to face a unlike direction, Pillow enables you to flip it. This is washed using the transpose part, which takes whatever of the following parameters:
-
Paradigm.FLIP_LEFT_RIGHT, which flips the image horizontally -
Image.FLIP_TOP_BOTTOM, which flips the paradigm vertically -
Prototype.ROTATE_90, which rotates the image to a certain degree, depending on the angle
epitome = Image.open('sample.jpg') prototype.transpose(Image.FLIP_TOP_BOTTOM) prototype.salvage('sample_flip.jpg') 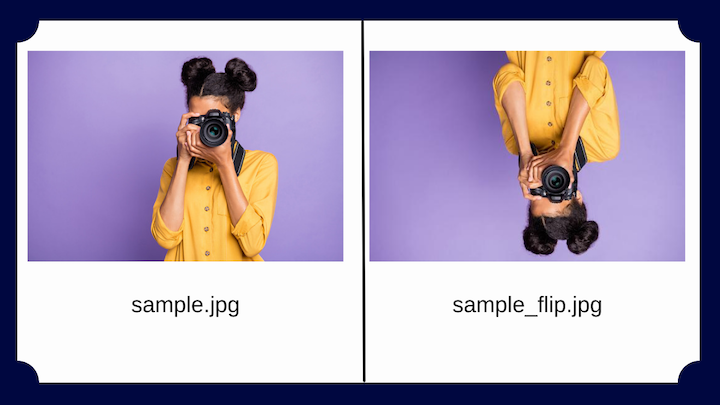
The resulting epitome is flipped vertically.
Alternatively, you can rotate images using the rotate() method. This takes an integer or float statement representing the degrees of rotation and returns a new Epitome object of the rotated image. The rotation is counterclockwise.
prototype = Prototype.open('sample.jpg') image.rotate(90) image.save('image_rotate90.jpg') 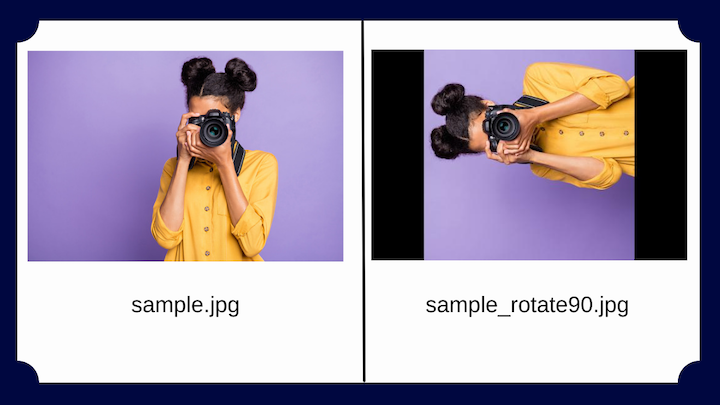
The image is rotated by an angle of 90 degrees.
Cropping images
To ingather an paradigm is to cut out just a specific portion. Cropping frequently comes into play when editing images for spider web applications.
The crop() role in Pillow requires the portion to be cropped as a rectangle. The method takes a box tuple that defines the position and size of the cropped region and returns an Image object representing the cropped image. The region is defined by a 4-tuple, where coordinates are (left, upper, right, lower).
image = Image.open('sample.jpg') epitome.crop(200, l, 450, 300) epitome.salve('sample_cropped.jpg') 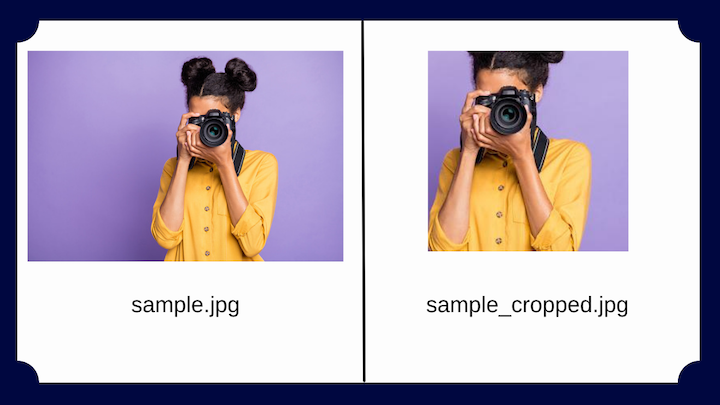
In the example to a higher place, the commencement two values correspond the starting position from the upper-left; the third and fourth values represent the distance in pixels from the starting position toward the right and lesser direction.
The full size of the cropped prototype can be calculated as 250×250 pixels.
Colour transformation
There are various forms of pixel representations, including L (luminance), RGB, and CMYK.
Pillow allows y'all to convert images between different pixel representations using the convert() method. The library supports transformations betwixt each supported mode too as the "Fifty" and "RGB" modes. To catechumen betwixt other modes, you may have to use an "RGB" image.
image = Prototype.open('sample.jpg') grayscale_image = image.convert('50') grayscale_image.save('sample_grayscale.jpg') 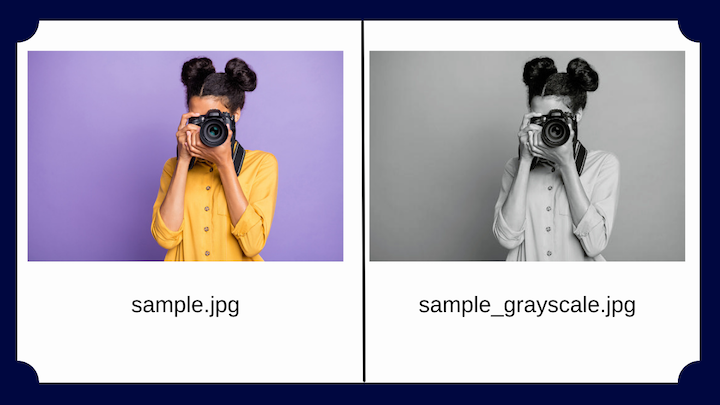
Using the convert function, the sample image is converted from RGB to L (luminance) manner, which will result in a grayscale image.
Image filtering
The act of modifying and enhancing images to amend the appearance tin be known as filtering.
Using the ImageFilter module from Pillow, you can admission to the filter() method and employ various filter techniques, including:
-
Mistiness -
Contour -
DETAIL -
EDGE_ENHANCE -
EDGE_ENHANCE_MORE -
EMBOSS -
FIND_EDGES -
Acuminate -
Smoothen -
SMOOTH_MORE
For instance, allow's take a look at the FIND_EDGES filter:
from PIL import Image, ImageFilter epitome = Paradigm.open up('sample.jpg') edges_image = image.filter(ImageFilter.FIND_EDGES) edges_image.save('sample_edges.jpg') 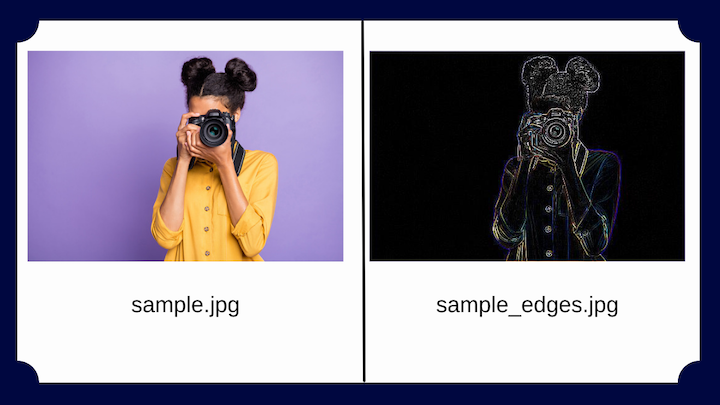
The filter processes the epitome to display the edges of the paradigm.
Any image can be processed using any of the filters available to produce the desired output.
Processing images with Pillow: A practical instance
At present that we take a basic understanding of the library, permit's create a simple python script to automate the processing of various types of images.
Allow'due south say yous're given a group of images and asked to add a watermark to each prototype.
To solve the problem, you can create a Python file called script.py in the same binder equally the images.
Get-go, import all necessary modules:
import os from PIL import Image
The OS module in Python provides functions for creating and removing a directory and changing and identifying the current directory.
Create a directory for the candy image:
os.makedirs('watermarked_images') Shop the width and superlative of the logo image:
logo_image = Epitome.open('watermark_logo.png') logo_image = logo_image.resize((50, 50)) logo_width, logo_height = logo_image.size Employ the os.listdir function together with a for loop:
for epitome in bone.listdir('./images'): endeavor: # Separting the filepath from the image'due south name path, filename = os.path.split(image) filename = bone.path.splitext(filename)[0] Open up the image:
prototype = Epitome.open('./images/'+image) #Resizing the image to a fix size. edited_image = image.resize((300, 300)) #Setting the position for the placement width = edited_image.width height = edited_image.elevation Use the paste role to position the logo on the image:
edited_image.paste(logo_image, (width - logo_width, peak - logo_height), logo_image)
Relieve the images in the new directory:
edited_image.relieve('./watermarked_Images/' + filename + ".jpg") Each paradigm in the directory has been processed and the watermark added. This script enabled us to efficiently perform the task in less time.
You tin can also check out the GitHub repository for the full code and resources associated with this tutorial.
Decision
Pillow is a powerful library for processing images in Python. In this tutorial, we established a foundational agreement of how to perform bones operations on images in Python using Pillow.
If yous want to learn more, bank check out the official Pillow documentation.
LogRocket: Full visibility into your web and mobile apps

LogRocket is a frontend awarding monitoring solution that lets yous replay problems as if they happened in your own browser. Instead of guessing why errors happen, or request users for screenshots and log dumps, LogRocket lets you replay the session to quickly empathise what went wrong. It works perfectly with any app, regardless of framework, and has plugins to log additional context from Redux, Vuex, and @ngrx/store.
In add-on to logging Redux actions and state, LogRocket records console logs, JavaScript errors, stacktraces, network requests/responses with headers + bodies, browser metadata, and custom logs. It also instruments the DOM to record the HTML and CSS on the page, recreating pixel-perfect videos of even the most complex single-page and mobile apps.
Attempt it for free.

How To Use Pillow Python,
Source: https://blog.logrocket.com/image-processing-in-python-using-pillow/
Posted by: kongnoestringthe.blogspot.com
0 Response to "How To Use Pillow Python"
Post a Comment